
Many retail teams get stuck with counters that were never built around their actual workflow. The counter becomes a storage dump, the queue blocks the entrance, or the POS cables are a tripping hazard.
That checkout zone also carries weight beyond the transaction. Almost three-quarters of U.S. adults made an unplanned in-store purchase in the past month, according to a 2025 Shop! Association survey, and the counter is often the last chance to capture that spend.
Terminology adds another layer of confusion. Cash wrap, checkout counter, cash register stand, service counter: the terms get used interchangeably, and that creates problems when you're trying to spec a project. This guide covers counter types, dimensions, POS integration, materials, merchandising, cost drivers, and what a multi-location rollout actually requires.
Key Takeaways
- Treat the checkout counter as both an operational workstation and a controlled merchandising zone.
- Plan dimensions around staff movement, POS hardware, customer clearance, storage, and accessibility.
- Match materials and construction to traffic, cleaning routines, brand presentation, and service life.
- Multi-location programs need repeatable designs, quality checks, and reorder support instead of one-off builds.
What Is a Retail Checkout Counter or Cash Register Stand?
A retail checkout counter—or cash register stand—is the fixed workstation where staff complete sales, handle payments, and finish the last few feet of the shopper journey. It anchors the POS hardware, bagging space, and often a slice of impulse merchandising.
Core Functions of a Checkout Counter
A checkout counter does more than ring up sales. In a single shift, staff use it to:
- Process payments and handle cash, card, and digital transactions
- Scan, bag, and hand off products
- Manage returns and exchanges
- Answer customer questions and enroll shoppers in loyalty programs
- Store bags, receipts, and daily supplies within reach
Cash Register Stand vs. Cash Wrap
The terms aren't always used consistently across the industry, but the practical distinction is clear. A cash register stand is typically a compact platform built for one register and a payment terminal. A cash wrap, by contrast, usually includes a full work surface, storage, cable management, branding, and space for customer-facing merchandising.
Matching the Fixture to the Environment
Use cases vary widely by retail format:
- Supermarkets need multiple lanes with queue management and high-volume bagging
- Specialty retail often prioritizes brand presentation over transaction speed
- Automotive parts and service environments pair the counter with product education
- Showrooms and dealer networks combine transactions with consultative selling
A modular, off-the-shelf stand works fine for a single location with standard equipment. Custom counters fit better for unusual layouts, integrated displays or coolers, or brand standards that must stay consistent across many locations.
Chicago Show's work for Lowe's, for example, wraps a Pepsi beverage cooler with shelving for snacks, candy, bottled water, and magazines. No stock unit handles that configuration.
Planning the Design, Layout, and Dimensions
Map the Transaction Workflow First
Before specifying materials or finishes, map the actual transaction. Where does the employee stand? Where do they scan products, take payment, and hand over the bag? Where do they reach for supplies without turning their back on the customer?
Counter placement also needs to work with the rest of the store:
- Entrance and exit flow, so the queue doesn't block foot traffic
- Sightlines for both staff supervision and loss prevention
- Emergency egress routes
- Proximity to other fixtures and available floor space
Design the customer-facing side and the staff-facing side separately. The front needs to look finished and on-brand. The back needs to work: cable routes, drawer access, and a surface that isn't cluttered with cords.
Dimensions: Planning References, Not Universal Rules
There's no single standard checkout counter size. Dimensions depend on store format, number of checkout positions, equipment list, and footprint.
As a planning reference, Econoco's published wrap-counter units run 48 inches long by 20 inches deep by 38 inches high, and 72 inches long at the same depth and height. Treat those figures as starting points, not a mandated standard.
Before requesting a quote, gather:
- Floor plan with wall and aisle dimensions
- Door and elevator clearances for delivery
- Utility locations (power, data)
- Full equipment list with dimensions
- Delivery path and installation access
Accessibility Requirements to Verify
Accessible sales and service counters have specific requirements under the 2010 ADA Standards. The accessible portion must be 36 inches high maximum for a parallel approach, or 30 inches long for a forward approach with knee clearance beneath. Checkout aisles specifically fall under a separate provision capping the surface at 38 inches high.

These figures aren't interchangeable, and local building codes may add requirements. Always verify specifics with a qualified architect or code official before production.
Design for future change as well. Accessible cable routes, modular storage, and adjustable equipment positions make upgrades easier down the line.
Counter Types, Materials, and Functional Features
Common Counter Configurations
Checkout fixtures come in a handful of standard shapes:
- Straight counters for simple, linear checkout
- L-shaped and U-shaped cash wraps for multi-function staff stations
- Island counters for center-of-store placement
- Compact register stands for tight footprints
- Service counters for returns, pickup, and customer-service desks
- Counters with integrated display areas for impulse and sample product
Material Options and Trade-offs
| Material | Strength | Watch-out |
|---|---|---|
| Laminate | Affordable, wide color range | Seams can swell if water gets in |
| Solid surface | Repairable, nonporous | Higher cost than laminate |
| Wood/veneer | Warm, branded look | Scratches and dents under heavy use |
| Metal/powder-coat | Resists chipping and cracking | Can show wear patterns over time |
| Acrylic | Lightweight, clear options | Scratches more easily than glass |
| Glass | Premium appearance | Requires careful, grit-free cleaning |
Features That Improve Daily Use
A few build details decide whether a counter holds up day after day:
- Reinforced worktops and impact-resistant edges
- Lockable drawers and adjustable shelving
- Cable management and concealed power
- Kick plates and bag hooks
- Replaceable panels for high-wear areas
Material and feature choices need to hold up against real conditions: traffic, cleaning chemicals, humidity, product weight, and how the unit will ship and install.
Chicago Show specifies materials for the environment a display will actually operate in before anything gets built. A tire counter faces different wear than a front-end snack rack.
Using the Checkout Area for Merchandising and Customer Experience
The checkout zone works as a controlled merchandising opportunity beyond the transaction itself. Done right, it can support:
- Add-on accessories and samples
- Gift cards and seasonal items
- Service reminders near automotive checkouts
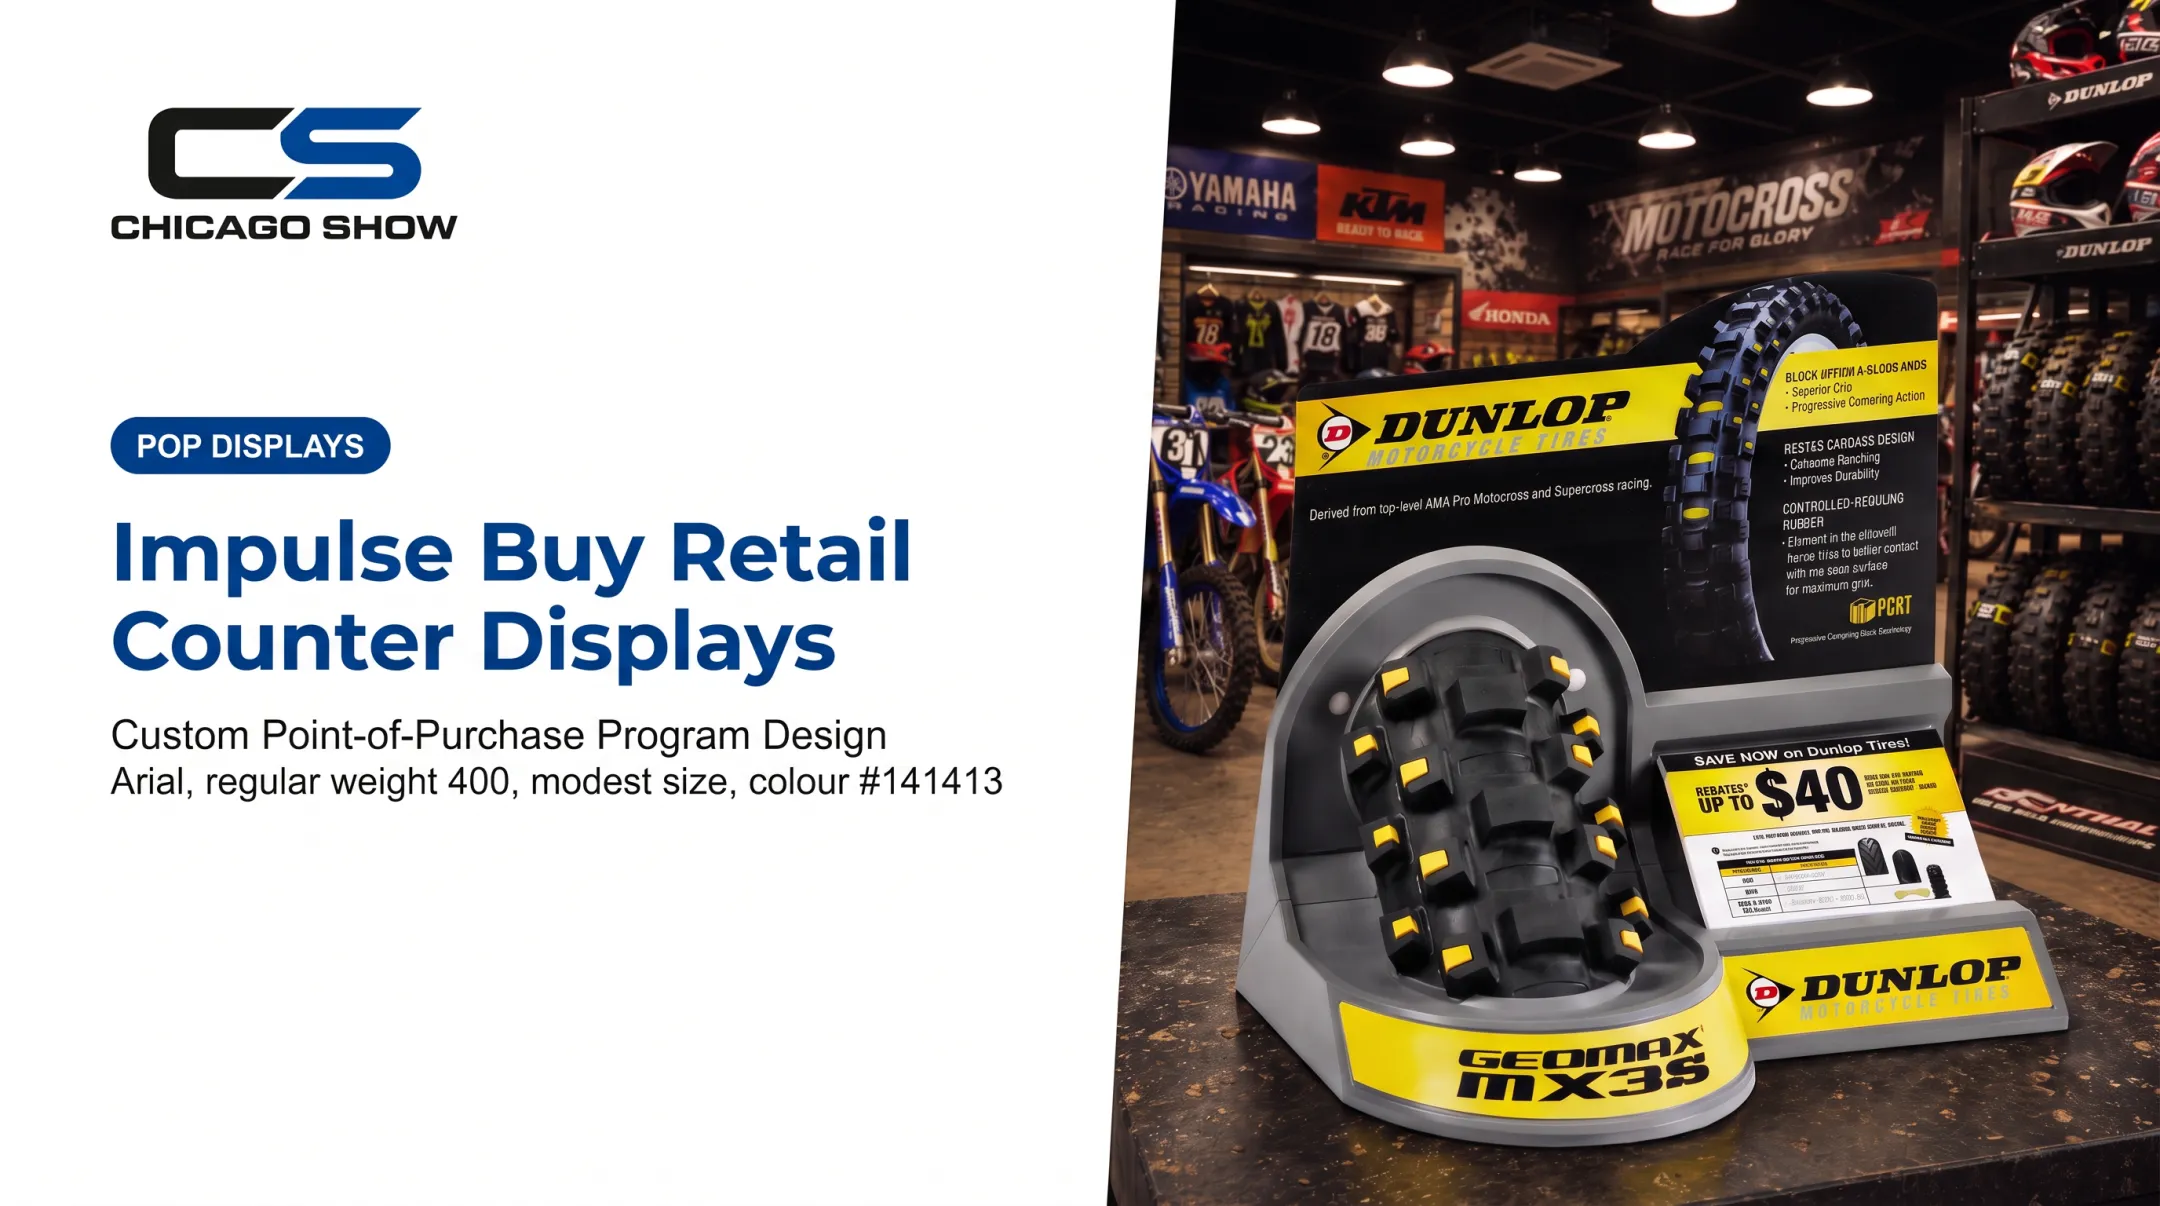
Match the merchandise to what's already in the customer's hands. Chicago Show's Counter & Countertop Merchandisers reflect this logic. A Dunlop motorcycle tire display carries technical graphics and a rebate offer, while a Monroe Shocks & Struts demo unit lets customers handle the product before deciding.
Both examples work because the assortment stays tight, which matters as much as the product itself. Fewer SKUs, more impact: clear pricing, strong signage, and consistent branding matter more than cramming in extra SKUs. A cluttered counter slows the line and undercuts the finish of the whole store.

Review performance regularly (sell-through, attachment rate, queue times, and display compliance) to decide what stays and what gets rotated out next season.
Cost Drivers and Choosing the Right Counter
Checkout-counter pricing has no fixed number. It moves with:
- Size, materials, and construction method
- Equipment integration (POS, scanners, scales)
- Storage, finishes, lighting, and graphics
- Quantity, engineering complexity, and customization
- Shipping and installation requirements
Those factors play out differently across three common formats:
- Stock counters cost less upfront and ship fast, but offer limited flexibility and inconsistent branding across locations
- Modular systems sit between stock and full custom: faster lead times than custom builds, more adaptable than stock
- Fully custom units cost more initially but deliver brand consistency, durability matched to your traffic, and easier long-term replacement planning
Before requesting a quote, prepare:
- Quantities and store locations
- Floor plans and equipment lists
- Required finishes and branding files
- Delivery schedule and installation expectations
- Desired rollout waves
Evaluate total program value, not just unit price. Field durability, packing efficiency, and consistency across locations usually matter more over a five-year program than a few dollars saved per unit on day one.
Custom Checkout Counter Programs and Rollout Support
A Practical Development Process
A custom-counter program works best when it follows a repeatable path:
- Discovery and requirements capture
- Concept development and material selection
- In-house engineering
- Production and quality inspection
- Pack-out, delivery, and installation management
Chicago Show runs that path as five checkpoints:
- Understand the Program
- Review the Details
- Manage Production
- Manage Through Delivery
- Support After Launch
Each stage confirms specs, quantities, timing, and constraints before anything is quoted or built.

Why One Accountable Partner Matters
Design intent gets lost when too many vendors touch a project between concept and installation. Chicago Show has built custom retail counters, cash register stands, and related merchandising units for over 124 years. Clients get one point of contact from first call through final delivery.
That single-partner model covers the handoffs that usually break multi-vendor projects:
- Spec checks on units before shipping
- Kitting and pack-out for complete displays
- Fulfillment support so counters reach each location ready to install
What Multi-Location Programs Need
Rolling out counters across dozens or hundreds of stores requires more than a good first build. It requires:
- Standard drawings and approved materials
- Documented specifications for repeatable production
- Program history to support reorders
- Refresh cycles and rollout-wave planning
If you're planning a custom checkout-counter program, bring these to the first conversation:
- Floor plans and equipment requirements
- Quantities and timing
- Brand standards
Having those details ready makes scoping faster and keeps early decisions aligned with store reality.
Frequently Asked Questions
How much does a checkout counter cost?
Pricing depends on size, materials, equipment integration, storage, finishes, quantity, customization, and delivery requirements. Request a quote based on your actual project specifications rather than a general estimate.
What are some creative retail checkout counter ideas?
Consider branded fronts, integrated lighting, compact impulse displays, and seasonal merchandising zones. Concealed storage and modular components also help the counter adapt as product mix changes.
What are the typical dimensions of a checkout counter?
Dimensions vary by store format and equipment. Common wrap counters run 48 to 72 inches long and about 38 inches high. Factor in staff and customer clearance, storage, queue space, and ADA accessibility requirements before finalizing a design.